Whack-That block
Using this block
In the whack-a-mole game, the player has to tap on the ‘bad’ object, often a mole or worm to stop them. Whack all the “moles” before the time is up.
Example Uses
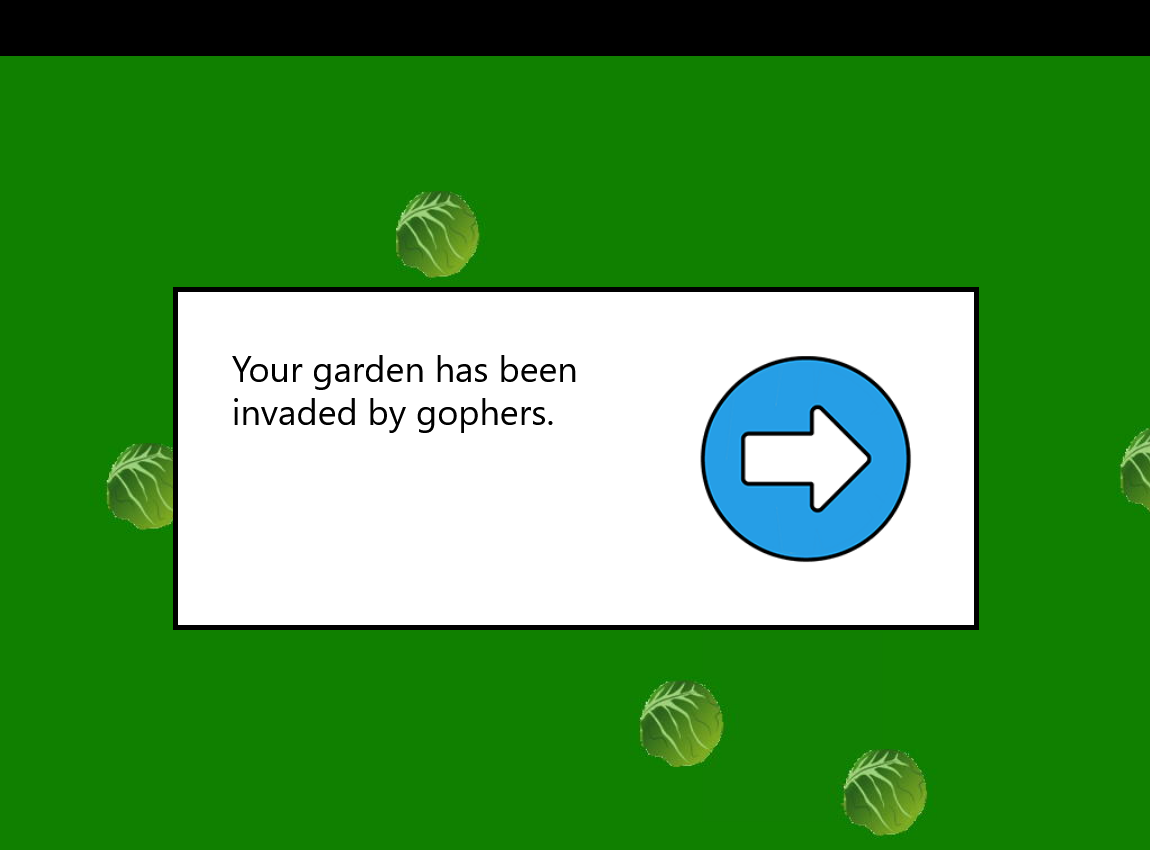
This versatile block has been used in many games. In teaching about agriculture, a player needs to hit all the gophers in their garden before they eat all the cabbage. In another agriculture science game, they squash worms before they eat the corn. In games teaching history, players hammered down spikes to lay railroad or clicked on soldiers to capture the enemy.
Making it your own
What’s in the block
Like every block, the whack-a-mole game block has two files in the folder:
- An HTML file: whack_that.html . You should not have to change anything in this file.
- A config file: whack_config.js – This is where you will make any changes to create your unique game.
As with most blocks, it also has an images folder. Any images used specifically in this block will be saved here. This will include the game background and the sprites for what the players need to “whack”.
The config file
This block has only one config section, the options section where we add everything from the instructions to the images of the things that need to be whacked.
Page Options
As with all blocks, there is an options object. This contains instructions on how to play the game, where to go once it is over, what images and audio to use etc.
const options = {
	background: 'images/whack_back.jpg',
	scoreColor: "white", // Color of the score that shows at top of screen while playing
	completionURL: "../next_block/next_block.html", // URL to proceed to after the last screen
	soundtrack : "../../audio/timer_music.mp3" ,
	seconds: 30 ,
	//An array of text you want to cycle through at the start of the game
	instructions: [
		'Your garden has been invaded by gophers.',
			'Catch them before they eat all your cabbages!',
		'Click on a gopher to catch it.'
	],

	//the image popping out
	//If you have a spritesheet then you will need to input the width and height on a single frame
	//The handling of the frames is very basic
	the_mole: 'images/gopher_sprite6.png',
	frame_width: 60,
	frame_height: 60,


	//The number of rows to render
	row_num: 2,
	//The number of columns to render
	col_num: 4,
	//The space in px between each "mole" to whack
	//Note that this is the distance between each object (up down left and right)
	space: 250,
};- background – put the URL for the background image here, be sure it is in quotes.
- scoreColor – this is the color of the score that shows at the top. Make sure the color you pick is visible against the background you use!
- completionURL – you’ll see this in every block. It is the URL where you want to go on the completion of this assessment.
- seconds: How many seconds the player has to whack all of the things.
- soundtrack – put the URL for the audio file you want to use here, be sure it’s in quotes.
- Instructions – can be either html or just plain text. You can make an array of instructions and every element in the array will be shown before the game is started.
- the_mole – this is the image of the mole or object that needs to be whacked. It could be just one image or it can be a spritesheet, with multiple stages of the mole popping up and we will cycle through the images to show it coming out.
- frame_width & frame_height –this is a setting to slice the spritesheet. If you just have one image, set these to the actual width and height of the image. If you have two sprites for hiding and jumping, set these to the width and height for slicing.
- row_num – the numbers of rows of gophers to create
- col_num – the number of columns of gophers to create
- space – the space between each of the rows and columns of gophers
