Start here!
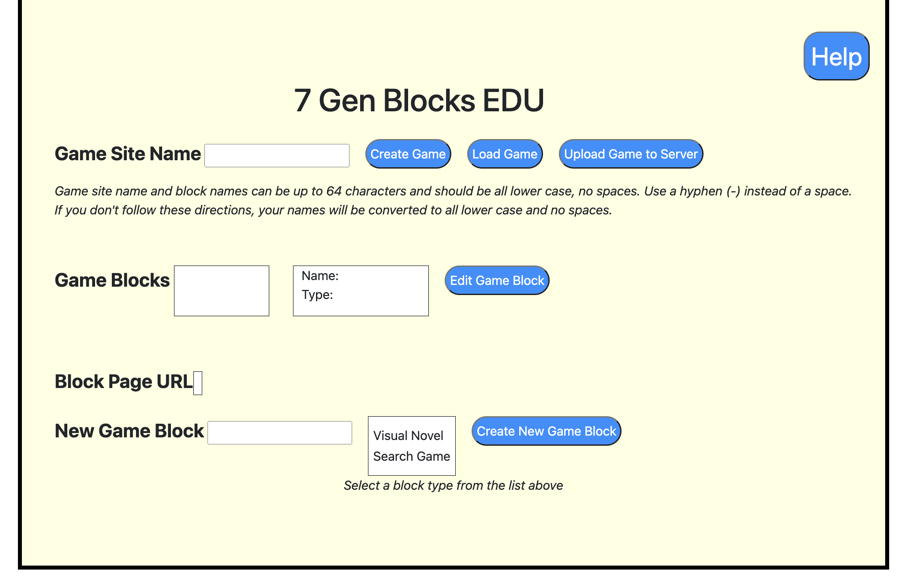
The game builder page is where you create or load a game, upload a game to the server and create new blocks. You can go straight to the Game Builder, but it’s probably wiser to read the rest of this documentation first.
1. Create your site and give it a name (or load an existing site)
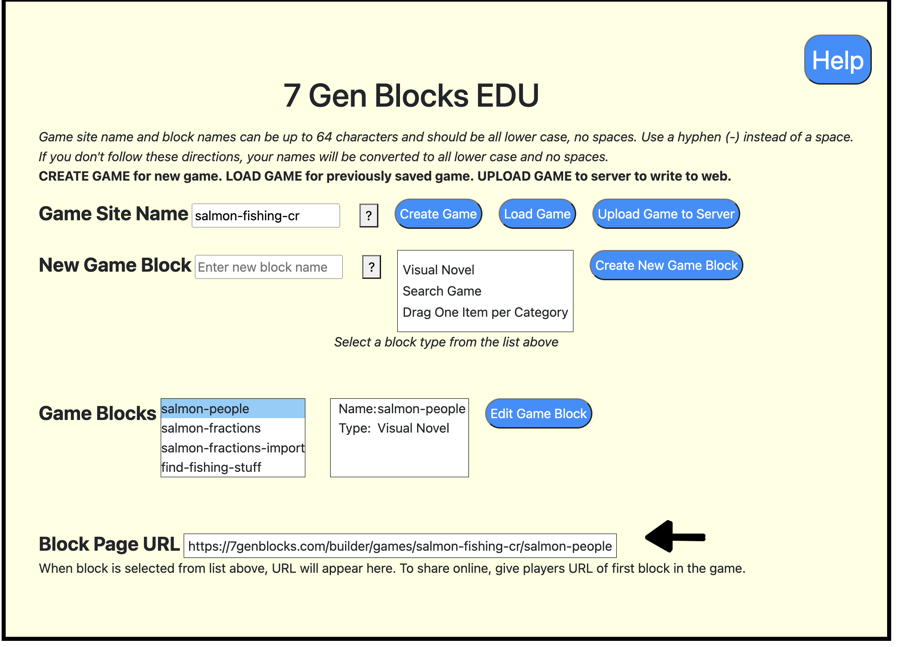
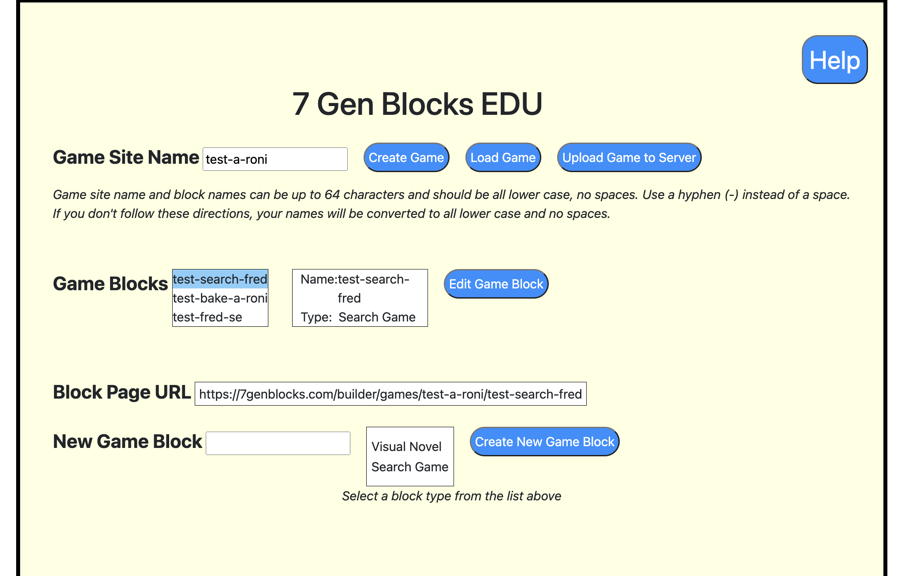
Give your game site a name – To start, type in a name for your game and click the Create Game button. This is going to be the web site where your users will play the game. When your game is completed, it will be found at :
https://7genblocks.com/builder/games/[your-game-name]/[your-first-game-block]/NOTE: Game site name and block names can be up to 64 characters and should be all lower case, no spaces. Use a hyphen (-) instead of a space. Also, don’t use special characters like & or quotations. If you don’t follow these directions, your names will be converted to all lower case and no spaces. Don’t worry, your game title can still be Billy Bob’s & Ethel’s Am@ze-a-roo. That comes later.
If you are editing an existing game, type in the name of the game and click the Load Game button.
2. Create a Game Block
Type in the name of your game block (same rules as above), select the type of block and click Create Block. There are three choices in the MVP; visual novel, search game and drag into categories. Your first block in the game should probably be a visual novel, where you will give your game a title and start with some kind of background story. If you have no idea where even to start with a story, you can check out our Scripts page for some inspiration.
Once you have created a game block, it will show up in your list of game blocks, as shown below, along with any other blocks you may have created previously for this game. Select the block you want to edit and click Edit Game Block. That will take you to the appropriate page, either Visual Novel, Search Game or Drag into Categories.
3. Edit your Block
Select your block in the Game Blocks list and click Edit Game Block. This will take you to the screen for that type of block, either
Once you’ve finished your block, preview it, save it and come back to the Game Site Builder main page. (Each block has a button at the top of the screen brought up by the Options tab that says Return to Site Builder.)
4. Upload your Game to the Server – Don’t Forget this Part!
Up until now, your game has been in working memory. As you’ve saved each block, it’s been added to the game being built. Now, it’s time to write your game to the web so it can be shared. Click on the Upload Game to Server button. Remember what your game name and first block name are! (Our next update will have a user login and a list of your games to choose from.)
To make sure your game loaded successfully, you can open another tab and type the url of your first block, where you game starts.
You can find the URL for your block in the Game Builder. Select the first block in your game and you’ll see the block page URL at the bottom of the screen.