Drag N Items into Categories Block
Using this Block
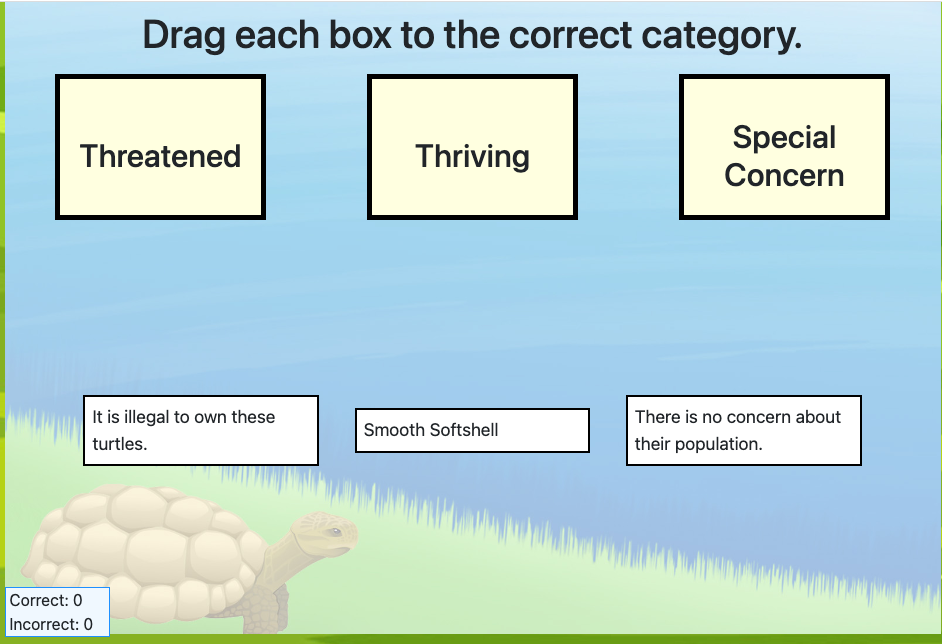
As the name implies, this block has categories and the player drags items on to the category that fits. When an item is dragged on the category, the player receives a message whether this is the correct or incorrect category. The dialog box gives a message in text, visually (red vs green background and box border color. Box border is either solid for correct or dashed for incorrect and a correct or incorrect sound plays.) The correct/ incorrect score box on the page has the number of correct or incorrect increased. Optionally, you can include a hint message for the player, as well as two different links to proceed, based on whether the player answered correctly or incorrectly.
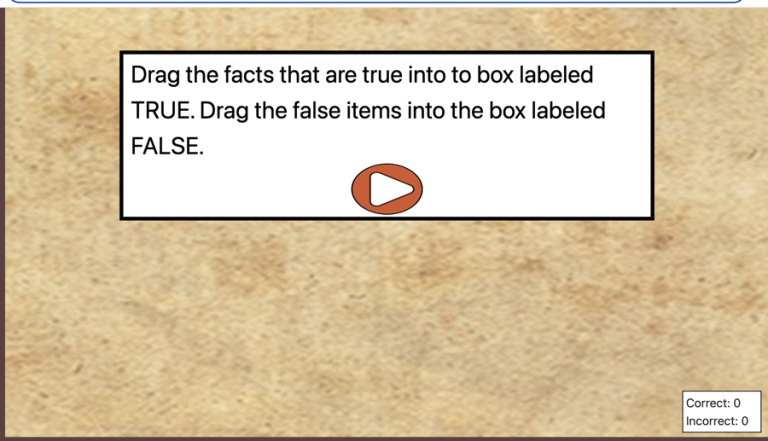
Note: There are three other “drag into categories” blocks. One is for true-false items, one for dragging only one item into a category and one is for dragging items into a sequence.
Each category can have as many (N) items dragged as you want.
Once an item has been dragged, it disappears from the screen and is replaced by a new item. The number of answers required per category is specified in the config file named drag_n_items_into_categories.js
The block has 3 categories. Why 3? Because the page is going to get confusing between the items and categories with more than 8 elements (categories + items) on the screen and we strongly recommend you only have 2 or 3 categories. Also, consider the fact that on smaller screens, 8 boxes are going to get pretty tiny.
Once the player has dragged the number of items specified into each category, the player is shown a box in the center of the screen with the number of correct and incorrect answers.

Making it Your Own
Like every block, the drag_n_items_into_categories block has two files in the folder:
- An HTML file: drag_n_items_into_categories.html . You should not have to change anything in this file.
- A config file: drag_n_items_into_categories_config.js – This is where you will make any changes to create your unique game.
As with most blocks, it also has an images folder. Any images used specifically in this block will be saved here. If you only use titles for the blocks, like in the example above, then this folder will be empty.
In the drag_n_items_into_categories_config.js file you’ll see two sections. The first sets page options and the second section sets categories and items.
Page options
const options = {
    itemsClass: "item",
 instructionsPage1: "Drag each box to the group whose view it represents, Northern Arapaho, Eastern Shoshone or the U.S. Government. <br/>" +
        "A category may be used more than once." ,
    instructionsPage1_audio: "audio/instructPage1.mp3" ,  // Optional - include audio here
    instructions: "<h3 class='text-center p-2'>Drag each item to its correct category.</h3>",
    instructions_audio: "audio/instructions.mp3" , // Optional - include audio here if you want
    completionURL: "../level_up/level_up.html", // URL to proceed to after the last screen if answers are correct,
    incorrectURL: "../next_block/next_block.html", // URL to proceed to after the last screen if answers are incorrect,
    randomizeItems: true,
    hintMessage: "If a hint message is given, a question mark will be in the top left, and show the hint when clicked" ,
    numberOfItemsOnScreen: 3, // How many items are shown on the screen at once
    numberOfAnswersRequired: 6, // The game stops after this number of items are dragged to a category
};
InstructionsPage1 can be either html or just plain text. If you want it to be centered, with a little padding and slightly larger text, paste it between the h3 tags. That, is just delete the – Drag each item to its correct category. – and type whatever you want instead. For plain text, simply paste the instructions text you want between the quotation marks after the :
OPTIONAL: If you would like to include an audio recording of the instructions on the first page
instructionsPage1_audio: If you would like instructions to be read to students when they click on a speaker button, put the audio file link here. If you provide an audio file, a speaker button will be shown.
Instructions: can be either html or just plain text. If you want it to be centered, with a little padding and slightly larger text, paste it between the h3 tags. That, is just delete the – Drag each item to its correct category. – and type whatever you want instead. For plain text, simply paste the instructions text you want between the quotation marks after instructions.
OPTIONAL: If you would like to include an audio recording of the instructions on the page with the categories, include the link.
instructions_audio: If an audio file link is given here, the file will play when a user clicks on a speaker button. Normally, this would just be the sentence(s) given for instructions, but the names of the categories and/or items could also be spoken.
completionURL – you’ll see this in every block. It is the URL where you want to go on the completion of this assessment if the player gets all the questions correct. This can be the same as the incorrectURL if you want players to always go to a specific page regardless.
incorrectURL – This is optional. If want players to go to a different URL if they don’t get all the answers right, enter that URL here. If you always want players to proceed to the same next page, you can enter the same URL as the completionURL or leave this line out altogether.
randomizeItems – by default, this is set to true, so items will be placed on the screen in random order. If you change it to false, the first item you list below will always be shown first, the second item will be shown second, and so on.
hintMessage: OPTIONAL – If you want a hint available for the player, enter it here. If a hintMessage is given, a question mark will be shown in the top right corner of the screen and when the player clicks on it, a hint will be shown. If you don’t have any hint, just leave the space between the quotes empty – “”
numberOfItemsOnScreen – This is the number of boxes that can be dragged into categories that are shown on the screen at one time. The default in the block is to show 4 but you can change it to any number. In the example above, I changed it to 3.
numberOfAnswersRequired – the default is 6 but you can change it to any number. JUST BE SURE THAT YOU HAVE AT LEAST THAT MANY ITEMS. So, you should not require 6 answers if you only have 4 items.
Categories and Items
Editing Categories
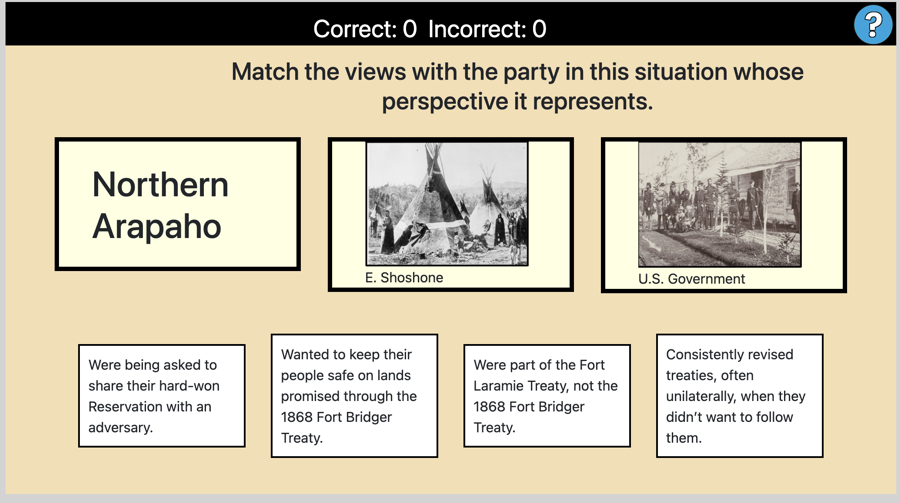
The categories are the “targets” to which you will drag something and the items are the boxes that you drag. Categories can have an image, a title- which is text that shows up in the box- or both. In the example below, category1 will just have a title, while category2 and category3 will have both an image and a title. If you don’t want a title, just delete that whole line or delete the text between the quotation marks so it looks like
categoryTitle: ” “,
Your title can include all the HTML you want for styling, or be just plain text, as you see in the examples below.
You need either a categoryTitle or an image because otherwise you’ll just have an empty box. I would usually have all the categories look the same but for this example, I have some with and without an image, just to illustrate your possibilities.
DO NOT CHANGE THE CATEGORYID.
const categories = [
{
categoryID: “category1”,
categoryTitle: “<h1 class=’mt-4 mb-4′>Northern Arapaho </h1>”,
},
{
categoryID: “category2”,
categoryTitle: “E. Shoshone “,
image: “images/shoshone_perspective.png”,
},
{
categoryID: “category3”,
categoryTitle: “U.S. Government”,
image: “images/us_gov_perspective.png”,
},
];
Editing Items
The most important thing to realize here is that the categoryID value for the item must match the categoryID for the correct category. This is how the program registers that the item has been dragged to the correct place.
For each item, simply type text in between the quotes after itemTitle. Remember that three or four items will be shown on the screen at a time, so it’s best not to make these titles really long.
The block you copy into your game comes with six items but you can add more by just copying and pasting after the last item. You can also have fewer items as long as your number of items is greater than or equal to the numberOfAnswersRequired that you specified in the options above.
In the config file that comes with blocks, the items are in order of all category1, the category2, then category3. That was just for convenience. The items can be in any order and, if you left randomizeItems in the options as “true”, the items will be pulled from the list randomly.
const items = [
    {
        itemTitle: "Had no reservation lands since U.S. Citizens committed the 1864 Sand Creek Massacre.",
        categoryID: "category1",
    },
    {
        itemTitle: "Had to rely on an adversary to share their lands with them.",
        categoryID: "category1",
    },
    {
        itemTitle: "Trusted the U.S. to uphold their treaty agreement." ,
        categoryID: "category2",
    },
    {
        itemTitle: "Wanted to keep their people safe on lands promised through the 1868 Fort Bridger Treaty." ,
        categoryID: "category2",
    },
    {
        itemTitle: "Often stood by and even supported their citizens when they broke treaties to invade other nations’ lands that held precious metals, like gold and silver." ,
        categoryID: "category3",
    },
    {
        itemTitle: "Consistently revised treaties, often unilaterally, when they didn’t want to follow them." ,
        categoryID: "category3",
    },

];
One Comment